Fitting a tyre to a rim is harder than it looks.
Most drivers try it once. Pinch the tube. Scratch the rim. Give up and call a professional anyway.
That’s the reality. But if you want to understand the process, or genuinely need to do it yourself, here’s exactly how it works. Step by step. No fluff.
And if at any point this sounds like too much hassle, mobile tyre fitting in London exists for a reason.
What Tools Do You Need to Fit a Tyre on a Rim?
Wrong tools ruin rims. They also make the whole job twice as hard.
Here’s what you actually need:
- Tyre levers (plastic, at least 2-3): Metal levers scratch alloy rims badly. Use plastic for any quality wheel.
- Tyre mounting lubricant: Purpose-made lube only. Soapy water is a temporary fix. Dish soap is alkaline and eats aluminium rims over time, causing bead leaks.
- Air compressor or high-volume pump: Essential for seating the bead. A slow hand pump often can’t deliver enough volume fast enough.
- Valve core remover: Removing the valve core before inflation allows maximum airflow. This makes bead seating much easier.
- Bead breaker (for removal): You need this to break the old tyre off the rim. Without it, you’re fighting a losing battle.
- Tyre pressure gauge: Always check final pressure after fitting.
Optional but helpful: a bead jack tool for especially tight tyre-rim combinations, and rim protectors if you’re working on expensive alloys.

| Tool | Why You Need It | DIY Alternative |
|---|---|---|
| Tyre levers (plastic) | Seat and remove beads safely | Metal levers (risk rim damage) |
| Mounting lubricant | Reduces bead friction | None (soapy water short-term only) |
| Air compressor | Seats bead with fast volume | High-volume track pump |
| Valve core remover | Maximises airflow during inflation | Pliers (carefully) |
| Bead breaker | Separates old tyre from rim | Two pry bars (risky on alloys) |
How to Remove a Tyre from a Rim First
Before you fit a tyre, you need to remove the old one.
This part gets skipped in most guides. It shouldn’t.
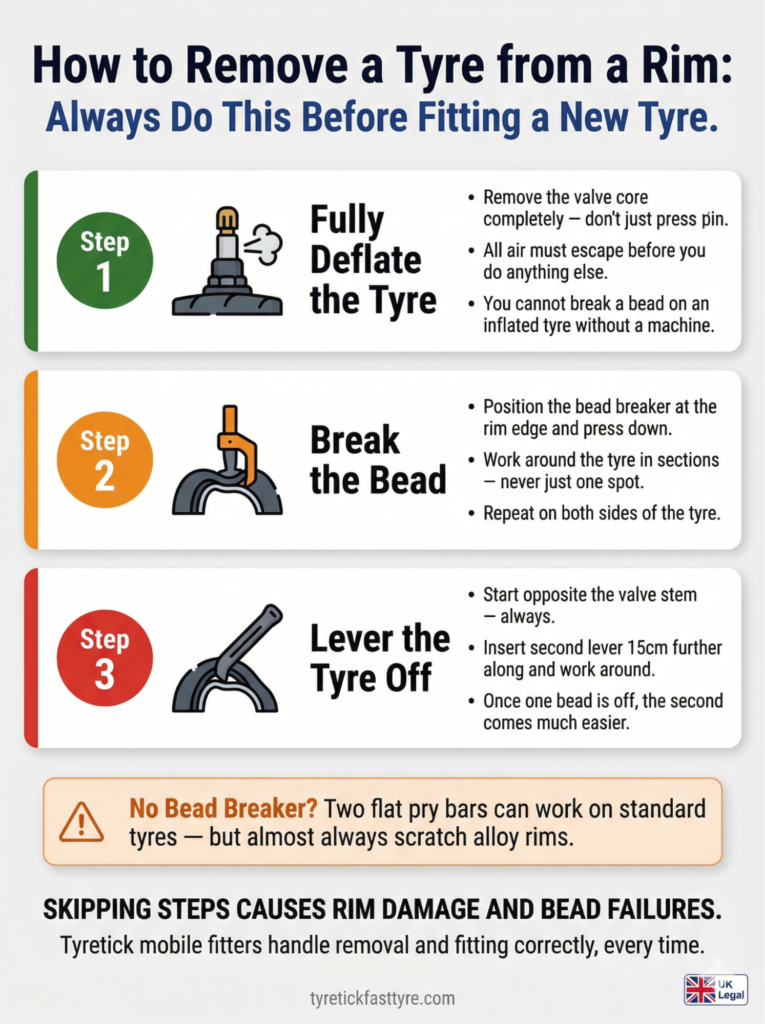
Step 1: Fully Deflate the Tyre
Remove the valve core completely. Don’t just press the pin. Take the core out with a valve removal tool. All air must escape. You can’t break a bead on an inflated tyre without a machine.
Step 2: Break the Bead
This is the hardest part for DIYers. The bead (the inner edge of the tyre) sits tightly against the rim flange. You need a bead breaker to detach it.
Position the bead breaker at the edge of the rim. Apply downward pressure. Work around the tyre in sections, not just one spot. Repeat on both sides of the tyre.
If you don’t have a bead breaker, two long flat-ended pry bars can work on standard tyres. Not recommended on alloy rims. Scratching is almost guaranteed.
Step 3: Lever the Tyre Off
With the bead broken, insert a tyre lever between the bead and rim. Pry one section of bead over the rim edge. Leave that lever in place. Insert a second lever about 15cm further along. Work it around the full circumference.
Start opposite the valve stem. Always. This protects the valve and gives you the most slack to work with.
Once one bead is fully off, removing the second bead is significantly easier. Flip the wheel over and repeat the lever process.

How to Mount a Tyre on a Rim by Hand
Now the new tyre goes on. This is where most people struggle.
The secret is the drop centre. That recessed channel in the middle of the rim. Get the bead into it, and you create slack. Ignore it, and you’ll fight the tyre the whole way.
Step 1: Prepare the Rim and Tyre
Clean the rim bead seat. Remove any rust, old rubber, or debris. Even small particles cause air leaks.
Apply mounting lubricant to both tyre beads (inside and outside) and to the rim bead seat. Generous coating. This single step makes fitting dramatically easier.
Check the tyre sidewall for directional arrows. Directional tyres must rotate the correct way. Fit them backwards and you’ll need to refit entirely. Also check that tyre diameter matches the rim diameter exactly.
Step 2: Seat the First Bead
Place the tyre over the rim. Start at the valve stem. Push the first bead (lower edge) into the rim channel by hand, working around the circumference.
The first bead usually goes on without tools. In most cases, hand pressure alone seats it fully. Push down and inward towards the drop centre.
If the tyre is very tight, use a tyre lever carefully. Insert it under the bead edge and lever it over the rim lip. Move in small increments. Don’t rush. Never use excessive force on carbon or alloy rims. Use plastic levers only.
Step 3: Seat the Second Bead
This is where it gets difficult. Accept that upfront.
Start opposite the valve stem. Push the second bead into the drop centre as you work around the rim. Both hands, steady pressure. The drop centre gives you the slack you need.
As you approach the last section near the valve, tension increases sharply. This is normal. Here’s the trick most guides skip: squeeze the already-seated bead sections into the drop centre using your knee or foot. This releases extra slack at the tight section.
Work the final section in small increments. Push the bead in with your thumbs, rotating your wrists inward. If it won’t go by hand, a tyre lever can help, but be very cautious near the inner tube if fitted.
Step 4: Check the Tyre Position
Before inflating, inspect the full circumference on both sides. The tyre should sit evenly on the rim. No high or low spots. No twisted sections. The mounting line (a thin coloured line on the tyre sidewall) should be equidistant from the rim all the way around. This tells you the bead is positioned correctly before air goes in.
| Common Issue | What It Means | Fix |
|---|---|---|
| Uneven mounting line | Bead not fully seated | Deflate, reposition, inflate again |
| Tyre won’t take air | Bead gap too large for seal | More lubricant, faster inflation |
| Loud pop on inflation | Bead seating (normal) | Normal, continue inflating |
| Slow hiss after fitting | Bead not fully seated or valve issue | Deflate, re-seat, check valve |
How to Seat a Tyre Bead on a Rim
Seating the bead is the final critical step. It’s different from just placing the tyre on the rim.
Seating means the bead snaps fully into the rim’s bead seat, creating an airtight lock. Without it, the tyre won’t hold pressure.
For Tube Tyres
Partially inflate the inner tube first, just enough to give it shape. This stops the tube folding on itself inside the tyre. Insert the tube, then push the valve through the rim hole. Don’t force it. When inflating, go slowly at first. The tube expanding helps push the beads outward into the bead seat.
For Tubeless Tyres
Remove the valve core entirely before inflating. This maximises airflow volume, which is what seats tubeless beads. You need a sudden rush of air, not a slow trickle.
Use an air compressor. A floor pump alone often can’t generate enough volume fast enough for tubeless. As you inflate, you’ll hear a series of loud pops. One pop per bead section snapping into place. That’s what you want. When you’ve heard pops all the way around both sides, both beads are seated.
If the bead won’t seat after several attempts, try this: deflate completely, re-apply lubricant to the bead and rim, push both beads into the drop centre, then inflate very fast with the valve core removed. Many stubborn beads seat immediately with this method.
Once beads are seated, reinstall the valve core and inflate to the correct operating pressure. Check the manufacturer’s specification on the tyre sidewall. Never exceed the maximum pressure marked there.
How to Install a Tyre on a Wheel with a Tyre Machine
Professionals don’t do this by hand. They use a tyre changer (mounting machine).
Here’s how it works differently:
- The rim is clamped onto the machine’s rotating platform.
- A bead breaker arm detaches the old tyre bead from the rim mechanically. No manual prying needed.
- A mounting arm positions the new tyre bead over the rim as the platform rotates. The tyre is pulled onto the rim automatically.
- Mounting paste is applied to the bead before fitting. Same lubricant principle, just applied more precisely.
- Inflation happens in a cage for safety. Never inflate a freshly fitted tyre without securing the wheel first. Bead blowout during inflation is extremely dangerous.
This is why home tyre fitting by a mobile professional is safer than DIY in almost every scenario. The machine does what hand tools cannot do reliably.
Run-flat tyres and high-performance wide tyres should never be fitted by hand. The sidewall stiffness makes hand-fitting virtually impossible without damaging the tyre. These require a specialist machine and trained fitters only.
How to Remove and Refit a Tyre on a Rim
Maybe you’ve had a puncture and need to repair the inner tube. Or you’re swapping seasonal tyres. Either way, the remove-and-refit process follows the same steps above, with a few extra considerations.
Inspect Before Refitting
Before the new or repaired tyre goes back on, check the inside of the tyre carefully. Run your fingers around the inside. Feel for nails, glass, or sharp debris. These cause immediate re-punctures if missed.
Check the rim too. Any sharp edges, cracks, or significant corrosion? A damaged rim can cut through a new tyre bead. Don’t refit to a compromised rim.
New Valve, Every Time
When removing and refitting tubeless tyres, fit a new valve. Valves are cheap. A failed valve at speed is not. The rubber degrades with each removal. Don’t reuse old rubber snap-in valves.
Wheel Balancing After Refitting
Any time a tyre is removed from a rim and refitted, wheel balancing is needed. The balance weights are removed during tyre changes. Without rebalancing, steering wheel vibration and premature tyre wear follow quickly.
Tyretick’s mobile wheel balancing service covers this alongside tyre fitting. No separate garage trip needed.
| Task | DIY Difficulty | Professional Recommended? |
|---|---|---|
| Standard car tyre removal | Hard (bead breaker needed) | Yes |
| Tubeless fitting | Very hard (compressor essential) | Yes |
| Run-flat fitting | Not possible by hand | Always |
| Wheel balancing after fit | Not possible at home | Always |
| Bead seating (tubeless) | Moderate with right tools | Recommended |
Common Mistakes When Fitting Tyres to Rims
These are the errors that damage tyres and rims. Avoid them.
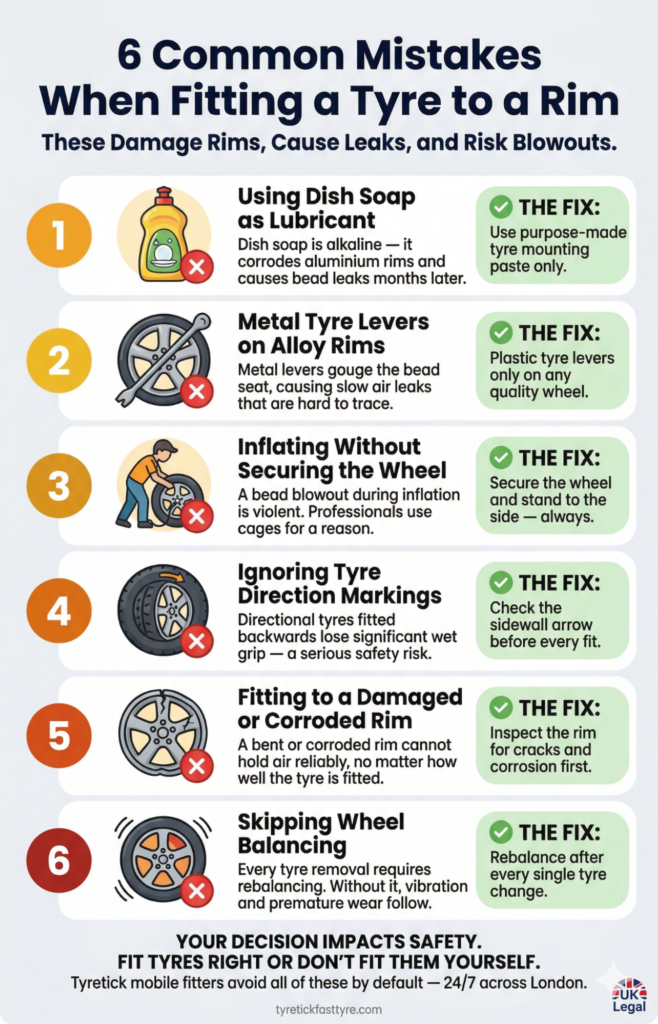
- Using dish soap as lubricant: It’s alkaline. It corrodes aluminium rims. It causes bead leaks months later. Use proper tyre mounting lubricant.
- Using metal tyre levers on alloy rims: Scratches are cosmetic. Gouges compromise the bead seat seal and cause slow leaks. Plastic levers only.
- Inflating without securing the wheel: A bead blowout during inflation is violent and dangerous. Always secure the wheel, and stand to the side during inflation.
- Ignoring tyre direction markings: Directional tyres fitted backwards have significantly reduced wet grip. Check the sidewall arrow every time.
- Fitting a tyre to a bent or corroded rim: A damaged rim will not hold air reliably no matter how well the tyre is fitted. Inspect the rim first.
- Skipping wheel balancing: Every tyre change requires rebalancing. No exceptions.
When to Call a Professional Instead
Honestly? Most of the time.
DIY tyre fitting makes sense in specific situations: fitting bicycle tyres, remounting a tyre on a trailer wheel, or learning the process in a controlled environment. For standard car tyres, the risk-to-reward ratio of DIY fitting is poor for most people.
Here’s when you definitely need a professional:
- Run-flat or high-performance wide tyres (machine-only)
- Low-profile tyres with stiff sidewalls
- Any situation where you’ve tried and the bead won’t seat
- Emergency roadside situations in London
- Any time wheel balancing is required afterwards
Tyretick’s 24/7 emergency mobile tyre fitting in London covers all of these scenarios. The fitter comes to you, wherever you are. No tow truck. No waiting room.
If you’re in Kensington, Brixton, Wembley, Bromley, or anywhere else across London, Tyretick Fast Tyre arrives typically within 25-50 minutes. Fully equipped van. Professional tyre changer machine. Wheel balancing included.
Frequently Asked Questions
Q: Can I fit a tyre to a rim by hand without tools?
For the first bead on a loose-fitting tyre, sometimes yes. The second bead almost always requires tyre levers. Bead seating requires an air compressor for tubeless tyres. Doing the full job tool-free is not realistic for standard car tyres.
Q: What lubricant should I use to mount a tyre on a rim?
Purpose-made tyre mounting paste or lubricant. Apply to both inner and outer tyre beads and the rim bead seat. Never use petroleum-based products (degrade rubber) or dish soap (corrodes aluminium). Need a professional fitting? Mobile tyre fitting in London includes all materials.
Q: Why won’t my tyre bead seat properly?
Three common reasons. Not enough lubricant on the bead. Not enough inflation speed (tubeless needs fast volume, not slow pressure). Or the bead isn’t sitting in the drop centre before inflation, which removes the slack needed for seating. Deflate fully, re-lubricate, and try again with the valve core removed for maximum airflow.
Q: Is it safe to fit a tyre myself?
For bicycle tyres, yes. For car tyres, it carries real risk, particularly during the inflation stage. An improperly seated bead can blow off the rim with serious force during inflation. Professionals use inflation cages for this reason. If in doubt, book home tyre fitting and let an expert handle it safely.
Q: How long does it take to fit a tyre to a rim professionally?
With a tyre changer machine, an experienced fitter typically mounts and balances one tyre in under 15 minutes. Tyretick completes a full mobile fitting, including balancing, in 30-45 minutes at your location.
Q: Can I refit a tyre after a puncture repair?
Yes, if the tyre itself is undamaged. Changing a punctured tyre involves removing it, patching or replacing the inner tube, then refitting. Always inspect the tyre interior for sharp objects before refitting. Always rebalance after.
The Bottom Line on Fitting Tyres to Rims
You can do it yourself. With the right tools, patience, and technique, it’s achievable for standard tube-type tyres.
But it’s not quick. It’s not easy the first time. And without a tyre machine, the results are harder to verify than a professional fit.
For London drivers, there’s a simpler option. Tyretick comes to you, 24 hours a day, with a fully equipped mobile tyre fitting van. All major brands in stock. All-season tyres, performance tyres, EV tyres and more.
Book your mobile tyre fitting today and get back on the road fast.